how to style a gallery wall

Styling a gallery wall on top of a Kerrings Cabinet

A gallery wall is a great way to create a focal point in just about any room or hallway and is a perfect example of the saying “greater than the sum of its parts.” In other words, by creating a grouping of several pictures, you can give importance to smaller works of art that might not have as much impact on their own. It’s a great decorating trick for anyone who is struggling to fill a large wall and doesn’t have the budget for large art, or for those of us who just love having lots to look at on our walls.

You can place a gallery wall just about anywhere you have room for one big piece of art (and "big" is relative to your space). There’s also no rule that a gallery wall has to be limited to just a living room or hall, or that you can only have just one in the house. In just a few easy steps, outlined below, you can create fun looks in nearly every room—even the bathroom or the kitchen, just make sure your art can withstand moisture or easily be wiped clean.
 

Create Your Own Gallery Wall
To help you create a gallery wall of your own, we asked design expert and content creator Gabriella Lelond of @designonhermind to share some of her best tips and walk us through how she created a gallery wall around her Samsung The Frame TV. Here’s her 5-step system:


Step 1. Choose a Focal Point
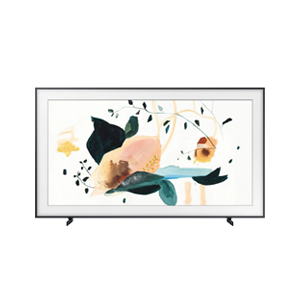
The focal point of Gabriella’s arrangement, is the incredible The Frame TV, which sits above her Kerrings cabinet. Unlike a traditional TV, The Frame masquerades as a piece of art, displaying fine art and downloaded images when it’s off. This gives Gabriella is a limitless selection of images that she can curate seasonally or whenever she feels like changing things up, using affordable downloaded images from Etsy or from the Samsung Gallery Store.

If you are not starting with The Frame TV, like Gabriella, select a piece of art to act as your focal point. Often that will be the largest piece of art, but if you’re working with several pieces that are similar in size, choose the one with the most visual impact.

Step 2. Gather Your Artwork
Once your focal point has been chosen, you can begin to collect the supporting pieces. For a cohesive look, try to keep a consistent theme. As a general rule, you want all the images to relate to one another in some way—outdoor, family, abstract—but you can mix two themes and still have it look cohesive. Using the same type or colour of frame throughout, for example, can help make a random grouping of pictures feel more unified. To ensure harmony, Gabriella also recommends sticking to three or four contiguous colours or a colour theme such as pastels, desert shades, black and white, etc.

TIP: If you have any unframed artworks to frame, now is the time to do so, or you can wait until you begin laying things out to decide on frames and matting.

Gallery walls are usually made up of several framed pieces of art, but don’t feel that you’re limited to just framed paintings, drawings, postcards, and photographs—you can also incorporate your mementos or treasures to give your gallery wall a deeper personal meaning and to reflect your personality of your interests. Use shallow shadowbox frames to showcase 3-dimensional objects or forego the frame entirely and hang items directly on the wall. This also helps to add some visual interest to the wall by introducing different shapes and dimensions.

Picture frames, postcards, and photographs
Measuring your space before styling your gallery wall

Step 3. Measure Your Space
Before you can start thinking about your layout, it’s a good idea to pull out your measuring tape to get the exact dimensions of your space.

As you can see in the photo above, other elements in the room can intersect with the gallery wall, as well, so be sure they’re in place during these planning stages. In Gabriella’s room the furniture and decorative accessories are a big part of the overall look and help to ground the arrangement.

Testing your gallery wall layout on the floor

Step 4. Test Drive your Layout
Once you know how much wall space you have to work with, Gabriella suggests marking off your dimensions on the floor to give yourself an area to create your layout. Because she is working around The Frame TV, which is a fixed object, Gabriella makes sure that its position is marked out as well.

Starting with your focal point picture in place, begin to build your arrangement around it, working from the inside (closest to the focal point) to the outside. You probably won’t nail your arrangement on the first go, so expect to do plenty of rearranging and editing.

Be sure to leave room around each frame. How much room to leave depends on the size and shapes of your pieces but try to keep things a minimum 1–2” apart.

Snap a photo of your galleryw all layout

Once you have an arrangement that you love, snap a picture of it from above. This will help you see what your gallery wall will look like when it’s on the wall, and will also give you a visual record to refer to when you’re hanging your art—especially if you have to move your art off the floor before you finish hanging it.

TIP: If you are truly nervous about this step and the next, consider laying-out your arrangement on a large piece of brown paper or wrapping paper (tape together widths as needed). Once you are happy with our layout, trace around each frame with a Sharpie and carefully mark the location of hanging hardware or holes. The entire piece of paper can be taped onto the wall and used as a template to transfer the location for each nail hole.

Hanging your art to your gallery wall

Step 5. Hang your Art
Gabriella says when you’re ready to hang the pieces, it’s easiest to start with your focal point and work your way outwards. And, get your measuring tape out, it’s time to measure again.

It might be helpful at this point to turn each picture over face-down, so you can see the type and position of the hanging hardware or holes on each frame. Then, using a light pencil or a strip of painter’s tape, begin to transfer the position of each frame and nail location onto the wall before hammering in any nails. It’s best to work with one picture at a time, just in case you need to make any small adjustments along the way.

TIP: There are several types of picture hangers on the market. If you are not sure of the type to use for your wall, we suggest asking for advice at your local home improvement store. Be sure to mention if you have heavy pieces to hang, as well, because you may need to use something more substantial, such as a screw and wall anchor or a specialty fitting.

Enjoy your gallery wall

Step 6. Enjoy Your Gallery Wall
Ok, we said there would only be five steps, but this last part doesn’t technically count as a step. Once your images are all in place, all that’s left to do is put away your tools and admire your work. The finished result should be a pleasing look that the eye first takes-in as a whole, then starts to explore piece-by-piece. Expect to spend a lot of time looking at and enjoying your new gallery wall—you’ll soon see what we meant when we said “greater than the sum of it’s parts.”

Be sure to follow Gabriella on Instagram at @designonhermind for more great DIY projects and glimpses of her beautiful gallery wall. It’s always fun to see what she has up on her The Frame TV.

We’d love to see your gallery walls, too. Show us your #DufresneStyle by tagging us on Instagram or TikTok.